LIS 568-THE RASTERBATOR: Makes printing large images possible and easy.
Before I get into this week’s post, I need to address the elephant in the room, or on the screen. I am well aware that this tool has an unfortunate rhyme scheme. Because of that, I’d share this with fellow librarians and faculty, but wouldn’t post it to my library website under student resources. Interesting side note, the tool developers were non-native English speakers and explained that they didn’t know the implication of their tool name until it was too late and had been adopted by numerous users. The term raster refers to a scanned image that is created by combining tiny dots or pixels and is the root of the tool name.
This week’s post is a bit different than my previous reviews. I speak more about the process of genrefication in my library that led me to utilize this tool than the ins and outs of the tool. I’ve found that this has been the most straightforward and easiest to use tool, and I thought it would be interesting to explain what would prompt me to use the tool.
This week’s tool is something that I came across on Kelsey Bogan’s Don’t Shush Me blog, linked here. Several of her posts discuss the process she used to genrefy her fiction section as well as her rationale for ditching Dewey. As part of her revamp, she made beautiful signage because we all know that ‘SIGNAGE IS IMPORTANT!’ She shares her templates on Canva (see my post from week 1) and is totally amazing!
A few years ago, the former school librarian decided to genrefy the fiction section at my secondary school. She utilized categories such as: Fantasy, Sci-fi Dystopian, Historical fiction, WWII/Holocaust Historical fiction, Sports fiction, Mystery/Suspense, Adventure and Survival, Horror & Supernatural, Adversity & Overcoming, and Relationships & Identity. At the beginning of the school year, I decided to combine Adversity & Overcoming and Relationships & Identity into a larger Realistic Fiction section. I also created a romance section. My rationale for changing the category titles was that I’d been reading a lot of literature about celebrating black joy and the importance of curating the novels that feature characters from marginalized populations. So many books focus on the negative and traumatic experiences of marginalized populations, while so few titles have characters who have ‘regular’ experiences.
I didn’t tweak any other category titles until the end of the school year because I wanted to get to know the collection and students. I was very aware that our fiction collection was uneven, as there were 9 bookcases for fantasy titles and only 1 for mystery. This ‘problem’ became more glaring as the school year progressed. The last quarter, I had ten 6th graders in my library skills class, and none of them liked fantasy. I was flabbergasted…and a bit judgy, but I also recognized that our fantasy section, which was nearly half of our fiction section, was alienating a whole group of students. I decided to divide the fantasy into the following subgenres: Dark Fantasy, Dragons, Epic Fantasy, Fairy-tale/retellings, Historical Fantasy, Myth, Paranormal, and Romantasy. I also divided the Science Fiction and Dystopian into separate sections and added a Quick Reads section. My library serves students in grades 6-12, and the Quick Reads section has several of the middle grade titles that appeal to my younger grade levels.
Last week I finished reorganizing the shelves and affixing the new spine labels to the titles. This week I worked on creating new signage. I designed several signs using Canva and The Rasterbator made printing large signs simple and easy.
It is easy to use
-1- Just load an image from a URL or your computer
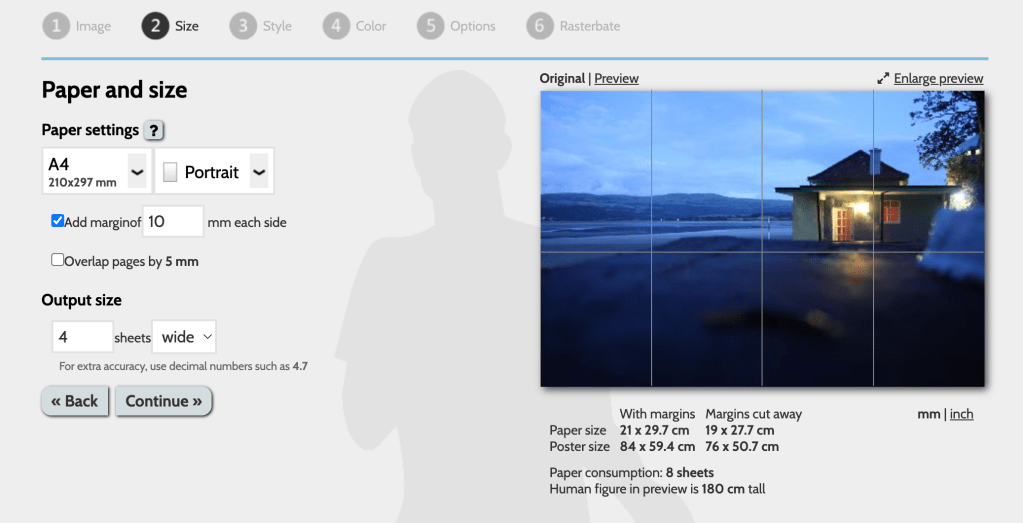
-2- Once you’ve chosen your image
A- select your paper size and orientation
B – decide if you want to set margins
C – determine how many page widths you want your final image to be
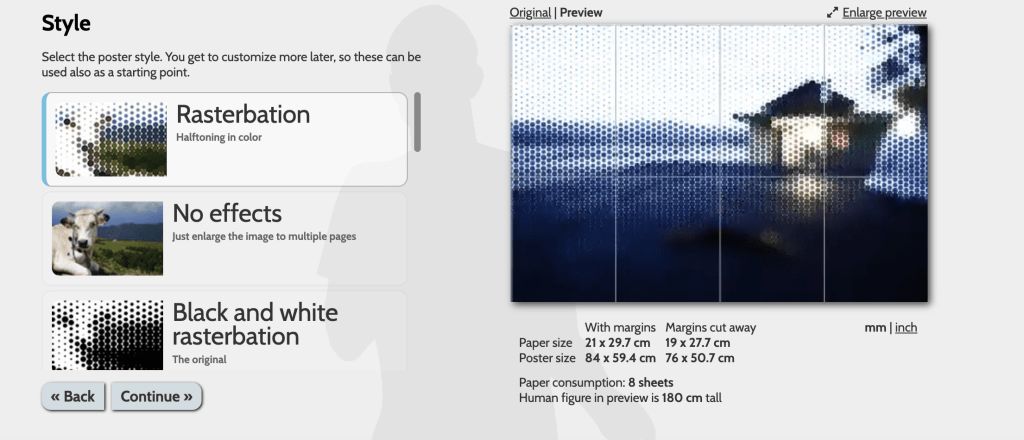
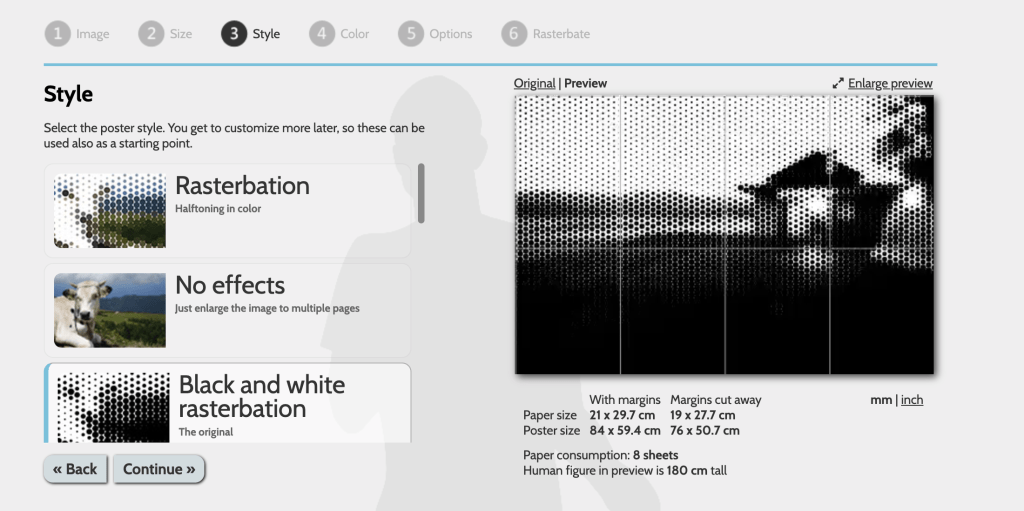
-3- Choose the output style
A – Rasterbation – Halftoning in color
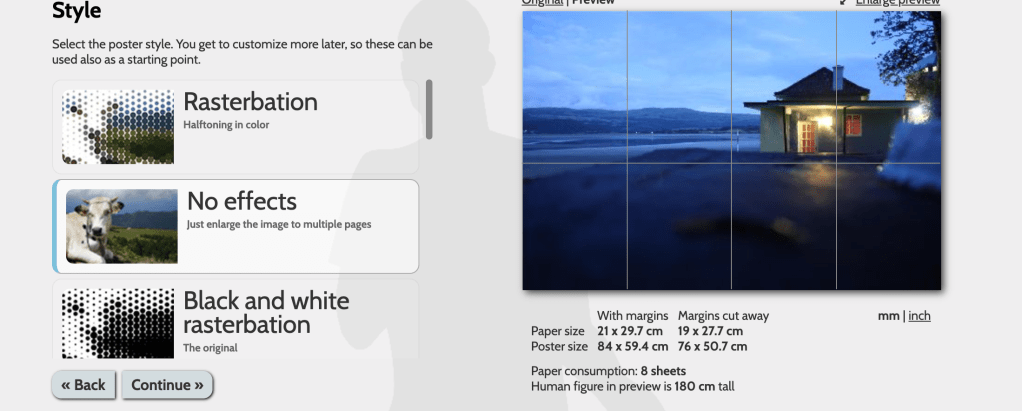
B – No effects –
C – Black and White Rasterbation
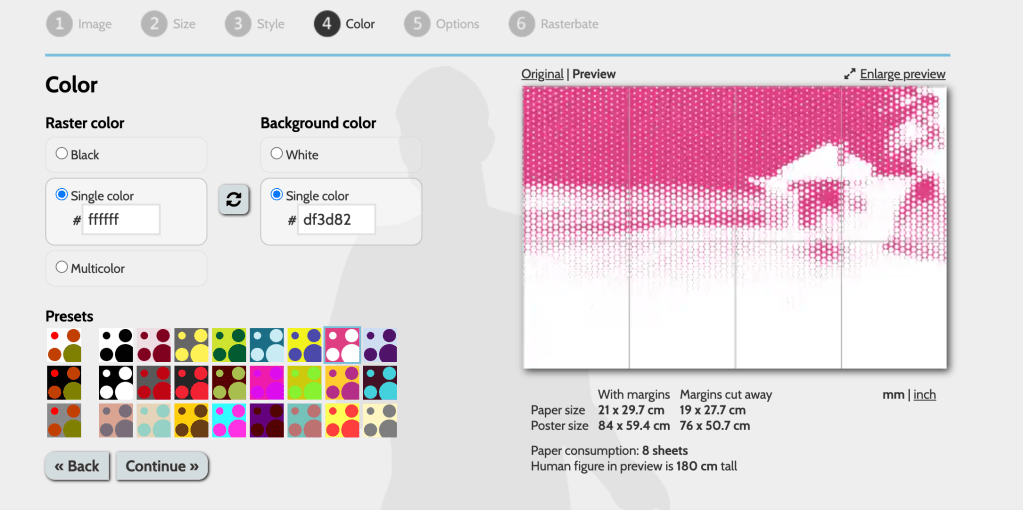
4 – Choose your color style
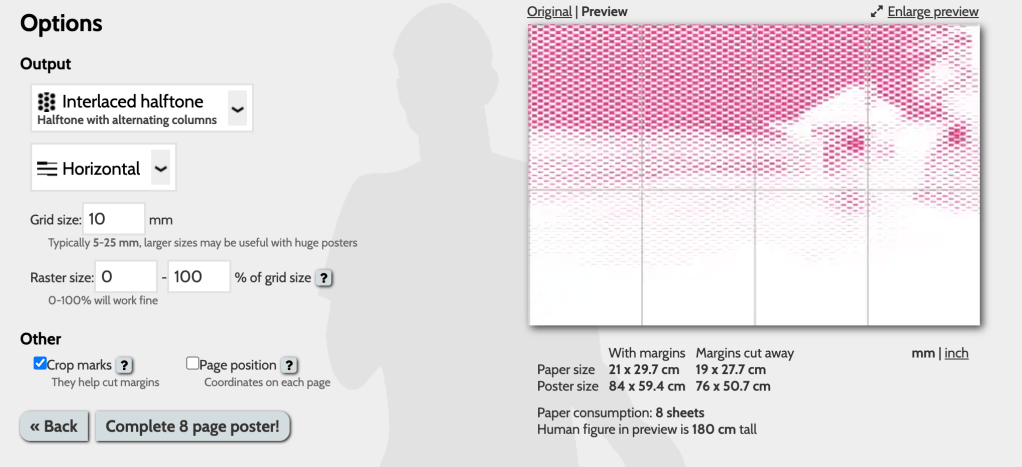
5 – Customize your options
*If you are doing a simple image enlargement, there will be fewer options here
If you visit the Rasterbator website, check out the FAQs. The section does a great job of explaining how to manipulate the settings to achieve your desired result.
When I started this article, I was psyched to share this ‘new’ tool with you all. I’ve been a teacher for twenty years, and I’ve never known an easy way to print out large designs. When I went to finalize this article, I came across several sites that were listed as alternatives to The Rasterbator. I was bereft that it had been around since 2004, and investigated some of the ‘competitor’ tools. Many were not comparable, so I decided not to mention them here. One that merits more investigation is Docuslice. It also has an app that I downloaded to my phone. I need more time to check it out, but I will update this sometime in the near future. Be sure to try The Rasterbator for all your printing needs! Leave a comment if you try it or you have some other similar tools to try. Happy Rasterbating…sorry I couldn’t help it!

Leave a comment